Welcome to the Lil Sew and Sew Instruction Manual, your essential guide for mastering the basics of sewing with this versatile machine. This manual provides detailed instructions.
From threading to advanced stitches, it ensures a seamless sewing experience, catering to both beginners and experienced users with clear, easy-to-follow guidance and helpful illustrations.
1.1 Overview of the Lil Sew and Sew Sewing Machine
The Lil Sew and Sew is a compact, multi-purpose sewing machine designed for versatility and ease of use. It is ideal for both beginners and experienced sewists, offering a range of stitches and features for various projects. The machine is lightweight and portable, making it perfect for small spaces or on-the-go sewing. With its user-friendly design, it supports basic and advanced techniques, from simple repairs to intricate designs. The included instruction manual ensures seamless operation, covering threading, stitch selection, and maintenance tips.
1.2 Importance of the Instruction Manual for Beginners
The instruction manual is indispensable for beginners, providing clear, step-by-step guidance to understand the machine’s operations. It explains basic functions, stitch selection, and troubleshooting, ensuring a smooth learning curve. The manual’s detailed instructions help users grasp essential sewing concepts, from threading to maintaining the machine. By following the manual, beginners can avoid common mistakes and build confidence in their sewing skills. It serves as a comprehensive resource, enabling users to maximize their sewing experience and achieve professional results from their first project onward.
Setting Up Your Lil Sew and Sew Sewing Machine
Setting up your Lil Sew and Sew sewing machine involves unboxing, inspecting for damage, identifying key components, and following initial setup instructions for smooth operation.
2.1 Unboxing and Initial Inspection
Welcome to the unboxing section of your Lil Sew and Sew sewing machine. Carefully unpack the machine, ensuring all components are included and undamaged.
Inspect the machine for any visible damage or defects. Check the power cord, accessories, and sewing tools to ensure everything is in perfect condition.
Verify that all parts, such as the bobbin, needles, and stitch guides, are present and properly stored in their designated compartments.
Refer to the provided checklist in the manual to confirm every item is accounted for before proceeding to setup.
If any component is missing or damaged, contact customer support immediately for assistance.
2.2 Identifying Key Parts and Components
Familiarize yourself with the key parts of your Lil Sew and Sew machine. Locate the spool pins, bobbin winder, and stitch selector dial for thread management and stitch selection.
Identify the power switch, foot pedal, and reverse stitch lever for controlling sewing operations. The needle bar, presser foot, and feed dogs are essential for fabric movement and stitching.
Understand the function of each component to ensure proper machine operation. Refer to the manual’s diagrams for a visual guide to these critical parts.
Proper identification of components is crucial for successful sewing and troubleshooting. Take time to explore and label each part for easy reference.
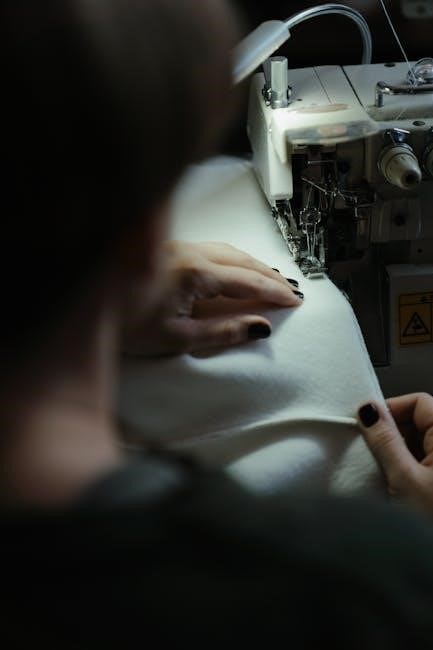
2.3 Threading the Machine: Step-by-Step Guide
Start by turning the handwheel to raise the needle to its highest position. Locate the spool pin and thread the machine by following the guides on the machine’s front.
Insert the thread through the tension disc and pull it gently to remove any slack. Wind the thread around the take-up lever and pass it through the needle’s eye from front to back.
Leave a small thread tail and gently pull it to ensure it’s seated properly. Use the manual’s diagrams to verify correct threading. Proper threading ensures smooth stitching and prevents machine issues.
2.4 Winding and Installing the Bobbin
Begin by placing the thread on the spool pin and pulling it gently to ensure it’s properly seated. Turn the handwheel to raise the needle to its highest position.
Wind the thread around the bobbin, filling it evenly without overfilling. Once wound, cut the thread and insert the bobbin into the bobbin case. Pull the thread to seat it correctly.
Close the bobbin case and ensure the thread is properly aligned. Proper bobbin installation is crucial for smooth stitching and prevents tangles or machine jams during sewing.
Basic Sewing Operations
Master essential sewing skills with the Lil Sew and Sew machine, starting with basic operations like straight stitching, backstitching, and simple fabric alignment. Follow the manual’s clear steps to ensure smooth sewing experiences, from threading to completing your first project. Proper tension adjustment and stitch selection are key for flawless results. Regular maintenance tips are also provided to keep your machine in optimal condition.
3.1 Starting Your First Sewing Project
Begin your sewing journey by gathering materials like fabric, thread, and the Lil Sew and Sew manual. Start with a simple project, ensuring the machine is properly threaded and the bobbin is installed. Choose a straight stitch for even seams. Adjust the tension as per the manual to prevent fabric bunching. Place the fabric under the needle, aligning edges carefully. Guide the fabric steadily, maintaining consistent speed. Don’t forget to backstitch at the start and end for secure seams. Follow these steps to complete your first project confidently.
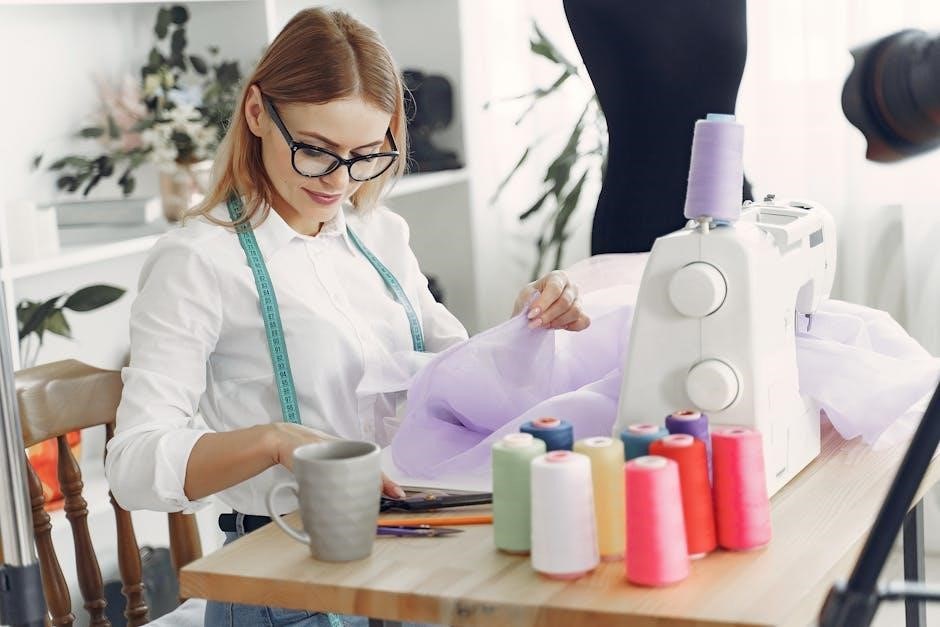
3.2 Selecting the Right Stitch for Your Fabric
Choosing the right stitch is crucial for a professional finish. Use the straight stitch for woven fabrics like cotton or linen, ensuring tight, clean seams. For stretchy materials like knits, opt for the zigzag stitch to allow flexibility. The backstitch reinforces seams at the beginning and end, while decorative stitches can enhance your project’s aesthetic. Always consult the Lil Sew and Sew manual for stitch recommendations tailored to your fabric type. Testing on scrap fabric first ensures the perfect stitch selection for your specific material.
3.3 Adjusting Tension for Perfect Stitches
Proper tension ensures even, professional-looking stitches. Start by threading your machine correctly and checking the bobbin installation. If stitches are uneven, adjust the upper thread tension by turning the dial gently. For loose stitches, tighten the tension; for tight stitches, loosen it slightly. Always test adjustments on scrap fabric to ensure balanced stitching. The Lil Sew and Sew manual provides detailed guidance for perfect tension settings tailored to your fabric type and stitch selection.
3.4 Sewing Speed: Tips for Beginners
Mastering sewing speed is key for consistent results. Start with a slow, steady pace to maintain control, especially when sewing straight lines or delicate fabrics. Use the speed control feature on your Lil Sew and Sew machine to adjust stitching pace. Practice on scrap fabric to build confidence. As you gain experience, you can gradually increase speed while maintaining precision. Remember, even stitching is more important than speed, so focus on steady movement and fabric flow.
Advanced Sewing Techniques
Explore the versatility of your Lil Sew and Sew machine with advanced techniques. Discover how to work with diverse fabrics, sew zippers, and create decorative stitches for professional finishes.
4.1 Working with Different Fabric Types
Mastering various fabric types is key to unlocking your Lil Sew and Sew machine’s full potential. From delicate silks to sturdy canvases, learn how to adjust settings and techniques for optimal results. Use sharp needles for woven fabrics and ballpoints for knits or stretch materials. Experiment with tensions and stitch lengths to ensure smooth sewing. The machine’s versatility allows you to handle everything from lightweight chiffons to heavy denims with ease, making it perfect for diverse sewing projects and enhancing your creative possibilities.
4.2 Sewing Zippers and Buttons
Adding zippers and buttons is a breeze with the Lil Sew and Sew machine. Use a sharp needle for precise zipper stitching and a heavy-duty needle for securing buttons. Align zippers carefully, using a zipper foot for even feeding. For buttons, select the buttonhole stitch to create custom fits. The machine’s adjustable tension ensures secure attachment. Experiment with different stitch lengths for varying button sizes, and use a thimble to handle thicker fabrics. This feature expands your creative possibilities, from clothing to crafts, with professional-looking results every time.
4.3 Advanced Stitches for Decorative Sewing
The Lil Sew and Sew machine offers a variety of advanced stitches perfect for decorative sewing. Use the satin stitch for smooth, shiny finishes on appliqué or embroidery. The blind hem stitch is ideal for invisible hems on curtains or dresses. Experiment with stretch stitches for knits or elastic fabrics. Adjust stitch length and width for custom effects, and use a twin needle for double-row stitching. These stitches add a professional touch to your projects, from home decor to intricate garment details, making your creations truly stand out.
Troubleshooting and Maintenance
Identify common issues like thread breakage or uneven stitches. Regularly clean and oil the machine to ensure smooth operation. Refer to the manual for detailed solutions and maintenance tips.
5.1 Common Issues and Solutions
Common issues with the Lil Sew and Sew machine include thread breakage, uneven stitches, or fabric not feeding properly. These are often due to incorrect threading, poor tension settings, or a dull needle. To resolve these, ensure proper threading, adjust tension according to fabric type, and replace needles regularly. For jammed bobbins or stuck fabric, gently remove the bobbin and clear any debris. Always refer to the manual for specific solutions and maintenance tips to keep your machine running smoothly and extend its lifespan.
5.2 Cleaning and Oiling the Machine
Regular cleaning and oiling are essential to maintain the Lil Sew and Sew machine’s performance. Turn off and unplug the machine before cleaning. Use a soft brush to remove lint and debris from the bobbin area and tension discs. Dampen a cloth with water to wipe down exterior surfaces, avoiding liquid contact with internal components. Locate the oil points as indicated in the manual and apply a few drops of sewing machine oil. Gently run the machine without fabric to distribute the oil evenly. Proper maintenance ensures smooth operation and extends the machine’s lifespan.
5.3 Replacing the Sewing Needle
To replace the sewing needle on your Lil Sew and Sew machine, start by turning it off and unplugging it for safety. Locate the needle clamp screw, loosen it using the screwdriver provided, and carefully pull the old needle straight out. Insert the new needle, ensuring it’s fully seated and the flat side faces the correct direction. Tighten the needle clamp screw firmly. Use a size 11 or 12 sharp or ballpoint needle, depending on your fabric type. Proper needle installation ensures smooth stitching and prevents machine damage.
Sewing Projects for Beginners
Start with simple projects like sewing a basic dress or creating a pleated skirt. Follow step-by-step guides for doll making, using easy-to-follow instructions and basic stitches.
6.1 Sewing a Simple Dress: A Step-by-Step Guide
Begin by gathering materials, including fabric, thread, and a measuring tape. Follow the manual’s guide to measure and cut fabric pieces for the top and bottom sections. Sew the sides and shoulders together, then attach the bottom to the top. Add a hem and neckline finish for a polished look. Use the machine’s basic stitches for seams and consider adding pockets for functionality. Refer to the manual for threading and stitch selection tips to ensure perfect results. This project is ideal for practicing foundational sewing skills and creating a customizable wardrobe piece.
6.2 Creating a Pleated Skirt
Start by measuring your waist and desired skirt length. Cut fabric according to the manual’s guide for pleated skirts. Fold and press the fabric to create even pleats, then sew them in place using a straight stitch. Sew the side seams together, leaving a small opening for the waistband. Attach a waistband or elastic for a finished look. Hem the bottom edge for a professional finish. Use the machine’s gathering stitch for evenly spaced pleats and refer to the manual for tension adjustments. This project is great for practicing pleating and working with various fabrics.
6.3 Doll Making: Sewing Instructions
Start by cutting out fabric for the doll’s body, head, arms, and legs according to the pattern. Sew the body parts together, leaving a small opening for turning. Use a ¼ inch seam allowance and backstitch at the beginning and end of seams. Turn the doll right side out and stuff firmly with polyester fiberfill. Sew the opening shut by hand. Add details like eyes, hair, and a mouth using embroidery floss or fabric paint. Sew ears onto the sides of the head for a finished look. Refer to the manual for specific stitching tips and patterns to create a charming doll.
Congratulations on completing the Lil Sew and Sew Instruction Manual! You’ve mastered the basics and explored creative projects. Keep experimenting with new techniques and fabrics to enhance your sewing skills.
7.1 Summary of Key Takeaways
This manual has guided you through setting up, operating, and maintaining your Lil Sew and Sew machine. You’ve learned threading, bobbin installation, stitch selection, and troubleshooting. Practical projects like sewing dresses, skirts, and dolls have boosted your confidence. Regular maintenance, like cleaning and oiling, ensures longevity. Experiment with fabrics and advanced stitches to expand your creativity. With these skills, you’re ready to tackle more complex sewing endeavors and enjoy the satisfaction of creating something handmade.
7.2 Encouragement for Further Sewing Exploration
Congratulations on completing the Lil Sew and Sew Instruction Manual! You’ve acquired essential skills to tackle various sewing projects with confidence. Don’t stop here—explore new fabrics, experiment with advanced stitches, and create unique designs. Sewing is a lifelong skill that fosters creativity and self-expression. Whether crafting clothes, home decor, or gifts, every project is an opportunity to learn and grow. Embrace challenges, join sewing communities, and share your creations. Happy sewing, and let your imagination stitch endless possibilities!