
Welcome to the Mikuni carburetor tuning manual! This guide will help you understand the basics of tuning Mikuni carbs for optimal performance, efficiency, and reliability.
1.1 Overview of Mikuni Carburetors
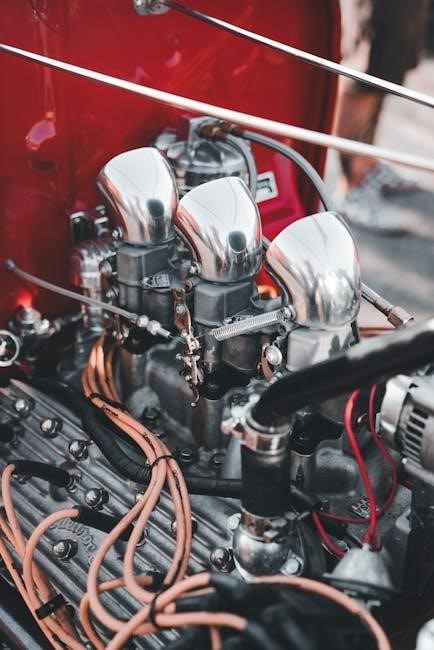
Mikuni carburetors are renowned for their performance and reliability, widely used in motorcycles and other vehicles. They feature a variable venturi design, allowing precise fuel flow control. Known for their simplicity and adjustability, Mikuni carbs are favored by enthusiasts and mechanics. This overview provides a foundational understanding of their structure and operation, essential for effective tuning.
1.2 Importance of Proper Tuning
Proper tuning of Mikuni carburetors is crucial for maximizing performance, fuel efficiency, and engine longevity. Incorrect tuning can lead to poor engine performance, reduced power, and potential damage. By ensuring the right air-fuel mixture, idle settings, and jetting, you optimize your engine’s operation. This section emphasizes the benefits of precise adjustments and the risks of neglecting tuning, providing a clear path to achieving peak functionality.
Understanding Mikuni Carburetor Components
Mikuni carburetors consist of key components like the idle circuit, main circuit, needle, and throttle position. These parts work together to regulate fuel flow and air intake.
2.1 Main Circuit and Jetting
The main circuit in Mikuni carburetors manages fuel flow during high-speed operation. Jetting refers to the size of the fuel orifice, which must be carefully selected to match engine demand. Proper jetting ensures optimal performance, preventing issues like lean or rich conditions. The jets are typically adjustable or replaceable, allowing tuners to fine-tune fuel delivery for specific engine modifications or riding conditions.
2.2 Idle Circuit and Mixture Screw
The idle circuit delivers fuel at low engine speeds, ensuring smooth operation. The mixture screw adjusts the air-fuel ratio by regulating airflow through the idle port. Turning the screw out leans the mixture, while turning it in enriches it. Proper adjustment is crucial for efficient idling and prevents issues like stalling or rough engine running during low-speed conditions.
2;3 Needle and Throttle Position
The needle regulates fuel flow between 1/2 to 3/4 throttle, with five notches determining richness. Position 1 is leanest, while position 5 is richest. Throttle position affects airflow, and the needle’s height adjusts fuel delivery. Proper alignment ensures smooth transitions and optimal performance across the power range, avoiding lean or rich conditions that can degrade engine efficiency and responsiveness. Adjustments require careful testing to match engine demands.
Tuning the Idle Circuit
Start with 1.5 to 2 turns out on the mixture screw. Adjust the idle screw for a slow, stable idle, ensuring proper engine operation at low speeds.
3.1 Initial Setup for Idle Speed
Begin by setting the mixture screw to 1.5 to 2 turns out. Adjust the idle screw to achieve a slow, stable idle, typically around 1100 RPM. This ensures proper engine operation at low speeds and serves as the foundation for further tuning.
3.2 Adjusting the Mixture Screw
Start with the mixture screw at 1.5 to 2 turns out. Fine-tune by listening to engine response—turn the screw clockwise for a leaner mixture or counterclockwise for richer. Adjust in small increments, testing throttle response. A correctly set screw will provide smooth idle and crisp throttle transition without hesitation or stumbling.
Tuning the Main Circuit
The main circuit delivers fuel at higher throttle openings. Proper jetting ensures optimal performance. Select jets based on engine specs and test under load for smooth power delivery.
4.1 Jet Selection and Installation
Proper jet selection is crucial for optimal performance. Choose jets based on engine specifications, performance requirements, and modifications. Install the selected jet by removing the old one, ensuring the carburetor is clean. Tighten securely to avoid leaks. Always test the bike under load after installation to confirm smooth power delivery and adjust if necessary for peak performance.
4.2 Testing and Adjustments
After installing the jets, test the carburetor under various conditions. Start with a warm engine and check for smooth acceleration. If the engine hesitates or runs lean, consider richer jets. If it runs rich, switch to leaner jets. Adjustments may require multiple tests to ensure optimal performance. Always retest after changes to confirm improvements in power delivery and responsiveness.

Needle Adjustment and Throttle Response
Needle adjustment fine-tunes fuel flow between 1/2 to 3/4 throttle. The needle has 5 positions, with 1 being leanest and 5 richest, affecting performance significantly.
5.1 Understanding Needle Positions
The needle position in a Mikuni carburetor regulates the fuel-air mixture at partial throttle. It features five adjustable positions, with position 1 being the leanest and position 5 the richest. Adjusting the needle impacts fuel flow between 1/2 to 3/4 throttle, affecting performance and engine response. Proper positioning ensures optimal fuel delivery, preventing issues like bogging or lean running. Test and adjust the needle based on engine feedback to achieve smooth power delivery.
5.2 Fine-Tuning for Optimal Performance
Fine-tuning involves precise adjustments to achieve optimal engine performance. Test rides under various conditions help identify the ideal needle position and mixture screw setting. Small changes can significantly impact throttle response and power delivery. Avoid over-adjusting, as this can lead to inconsistent performance. Incremental tweaks, followed by thorough testing, ensure the best balance of power, efficiency, and smooth operation across the throttle range.

Accelerator Pump Setup
The accelerator pump enhances low-speed performance by delivering additional fuel during throttle opening. Adjustments involve modifying the pump stroke or fuel flow to match engine demands precisely.
6.1 Adjusting the Accelerator Pump
To adjust the accelerator pump, locate the adjustment screw on the pump assembly. Turn the screw clockwise to reduce fuel delivery or counterclockwise to increase it. Start with a baseline setting, then test the throttle response during acceleration. Fine-tune the screw based on engine performance, ensuring smooth power delivery without hesitation. Be cautious not to over-adjust, as this can lead to incorrect air-fuel ratios. Always refer to your specific Mikuni carburetor manual for precise instructions tailored to your model. Adjustments may vary between RS and HSR series carbs, so verify the correct procedure for your setup. After adjustment, ride the bike to test the changes and make further tweaks as needed for optimal performance. Remember to keep the area clear and safe while working on your carburetor. Patience and careful testing are key to achieving the perfect throttle response.
6.2 Testing Throttle Response
After adjusting the accelerator pump, test the throttle response by gradually accelerating from a standstill. Pay attention to smoothness and power delivery. If the engine hesitates or stumbles, it may indicate insufficient fuel flow. Conversely, a surge could signal excessive fuel delivery. Ride in a controlled environment, like an empty parking lot, to safely assess performance. Make small adjustments to the accelerator pump and retest. Note any improvements or issues to refine the setup further. Ensure the area is clear of obstacles and wear proper safety gear. Documenting each change helps track progress and achieve optimal throttle response.
RS Series Tuning Components
The Mikuni RS Series carburetors are designed for high-performance engines, featuring adjustable components like jets and needles. Tuning these components ensures optimal fuel delivery and power output. Proper setup often requires adjustments based on specific engine modifications and performance goals. Always refer to the manufacturer’s guidelines for precise tuning recommendations and safety precautions.
7.1 RS Series Specific Adjustments
The RS Series carburetors are designed for high-performance engines and feature adjustable components like jets and needles. Proper tuning involves precise jetting based on engine modifications and performance goals. The variable venturi design allows for smooth airflow, but adjustments may be needed for optimal fuel delivery. Always refer to Mikuni’s guidelines for specific recommendations, ensuring the idle and main circuits are finely tuned for peak performance.
7.2 Jetting Recommendations
For RS Series carburetors, jetting recommendations vary based on engine modifications, altitude, and performance goals. Start with the standard jetting provided by Mikuni, then adjust based on testing. Fine-tune the main jets and needle positions to achieve the optimal air-fuel mixture. Always refer to Mikuni’s jetting charts and guidelines for specific configurations. Proper jetting ensures smooth throttle response, efficient fuel delivery, and maximized engine performance.
HSR Series Tuning Guidelines
The HSR Series is designed for high performance, with tuning components suited for most engine modifications. Adjustments may be needed for specific setups. Follow Mikuni guidelines for optimal results.
8.1 HSR Specific Tuning Tips
For HSR Series carburetors, start with the pre-set tuning components, as they are optimized for most engine modifications. Fine-tune by adjusting the mixture screw and needle position for specific performance needs. Ensure proper synchronization and test throttle response. Consult the manual for part numbers and adjustments. Regular maintenance and inspection are crucial for sustained optimal performance. Always refer to Mikuni guidelines for precise tuning.
8.2 Optimizing Performance Modifications
For the HSR Series, optimize performance by fine-tuning jets, needles, and mixture screws based on specific engine setups. Ensure proper synchronization and test throttle response. Regular maintenance and inspection are crucial for sustained optimal performance. Always refer to Mikuni guidelines for precise tuning to enhance fuel flow and air-fuel mixture at different throttle positions, ensuring peak efficiency and power delivery.
Jetting and Rejetting
Jetting and rejetting are crucial for optimizing Mikuni carburetor performance, ensuring proper fuel flow under various conditions. Jetting involves selecting the right jet sizes to match engine mods and operating conditions, while rejetting is the process of changing jets to address performance issues like lean or rich running. Proper jetting enhances fuel efficiency, power delivery, and prevents damage from incorrect air-fuel mixtures. Always follow Mikuni guidelines for accurate jet selection and installation.
9.1 When to Rejet Your Carburetor
Rejetting is necessary when modifying your engine, such as increasing displacement or adding performance components, to ensure proper fuel delivery. Altitude changes also require rejetting, as air density affects the air-fuel mixture. If you notice poor idle, decreased power, or rough running at specific RPM ranges, it may indicate the need for rejetting. Always rejet to maintain the correct air-fuel ratio for optimal performance and to prevent issues like overheating or reduced efficiency.
9.2 Step-by-Step Rejetting Process
Start by assessing your current jetting and identifying the need for change. Select the appropriate jets based on engine modifications and altitude. Remove the carburetor float bowl to access the main jet. Replace the old jet with the new one, ensuring proper seating. Reassemble the carburetor and test at varying throttle positions. Adjust as needed to achieve smooth operation and optimal performance. Always test in small increments to avoid over-correction.
Diagnostic Tips and Common Issues
Identify common issues like poor idle, bogging, or lean running. Check air-fuel mixture, jets, and idle circuits. Adjust mixture screws and clean or replace faulty components as needed.
10.1 Identifying Tuning Problems
Identifying tuning issues in Mikuni carburetors often starts with observing symptoms like poor idle, bogging, or lean/rich running conditions. Rough engine performance, backfiring, or uneven throttle response can indicate improper jetting or mixture settings. Pay attention to signs of lean conditions (excessive heat, detonation) or rich conditions (fouled spark plugs, smoke). These issues often stem from incorrect jet sizes, clogged circuits, or improper needle positions.
Begin diagnostics by checking the idle circuit and main jetting. Ensure the mixture screw is properly adjusted and verify that the main jets are clean and appropriately sized for your engine’s demands. Consult a vacuum gauge to assess airflow and detect blockages or imbalances in the carburetor circuits. Always refer to Mikuni-specific troubleshooting guides for precise solutions tailored to your model.
10.2 Troubleshooting Techniques
Troubleshooting Mikuni carburetors involves diagnosing issues systematically. Start by identifying symptoms like rough idling, poor throttle response, or inconsistent power delivery. Inspect for blockages in air and fuel circuits, and clean or replace components as needed. Use a vacuum gauge to check for airflow imbalances and verify proper synchronization between multiple carbs. Always refer to Mikuni-specific troubleshooting charts for precise solutions tailored to your model.
Test fuel flow by removing the fuel line and checking for proper delivery. If issues persist, check jet sizes and adjust accordingly. Use a tachometer to fine-tune idle settings and ensure proper mixture screw calibration. For advanced tuning, consult Mikuni’s official manuals or seek guidance from experienced technicians to resolve complex problems effectively.

Best Practices for Maintenance
Regular maintenance is crucial for optimal performance. Clean carburetor components, inspect for wear, and replace worn parts. Keep the air filter clean and ensure proper fuel flow. Always reference the manual for specific guidelines.
11.1 Regular Maintenance Tips
Regularly clean the carburetor and inspect for wear or damage. Replace any worn components promptly. Clean the air filter and ensure proper fuel flow. Schedule routine checks to maintain optimal performance and prevent issues. Always reference the manual for specific maintenance intervals and procedures tailored to your Mikuni carburetor model.
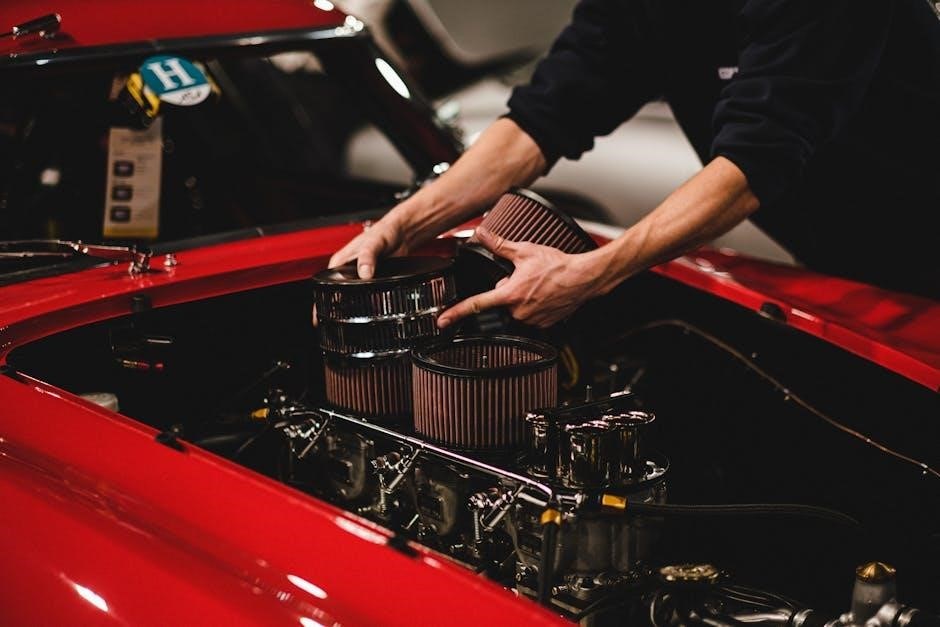
11.2 Cleaning and Inspection
For optimal performance, thoroughly clean the carburetor using a carb cleaner and a soft brush. Inspect all jets, passages, and components for blockages or wear. Replace any damaged parts to ensure proper fuel flow and air-fuel mixture. Regular cleaning prevents dirt and varnish buildup, which can affect tuning and engine performance. Always follow manufacturer guidelines for cleaning and inspection procedures.
Proper tuning of your Mikuni carburetor ensures optimal performance, efficiency, and reliability. Regular maintenance and inspection are crucial for sustained peak engine operation and longevity.
12.1 Summary of Key Points
12.2 Final Tips for Optimal Performance
For peak performance, ensure precise adjustments to the idle and main circuits. Regularly clean and inspect components to prevent wear. Adjust mixture screws and jets according to engine modifications. Test throttle response after changes and fine-tune iteratively. Consider RS and HSR series-specific recommendations for enhanced performance. Always consult manuals for precise settings, and remember, small adjustments can significantly impact efficiency and power delivery.