The ShelterLogic Shed-in-a-Box is a versatile, compact storage solution designed for seasonal use, offering protection from sunlight, rain, and debris. Its durable design and easy assembly make it ideal for storing garden tools, mowers, and equipment. Follow the instructions carefully to ensure safe and proper assembly, maximizing its lifespan and functionality. This guide provides a step-by-step approach to assembling and maintaining your ShelterLogic Shed-in-a-Box effectively.
Overview of the ShelterLogic Shed-in-a-Box
The ShelterLogic Shed-in-a-Box is a portable, compact storage solution designed for seasonal use, offering protection from sunlight, rain, and debris. Its durable frame and custom-fit cover provide reliable shelter for garden tools, mowers, and outdoor equipment. Made with quality materials, the shed features a peak-style design for efficient snow shedding and moisture resistance. While designed for temporary use, proper installation and anchoring are essential for stability. The product is ideal for small spaces, offering big value when storage needs are specific. Its compact footprint makes it a practical choice for homeowners seeking flexible storage options without permanent construction.
Importance of Following Instructions
Following the ShelterLogic Shed-in-a-Box instructions is crucial for ensuring safety, durability, and proper assembly. Improper installation can lead to structural issues, safety hazards, or damage to the unit. The instructions are designed to guide users through a step-by-step process, minimizing errors and ensuring the shelter withstands environmental stresses. Neglecting to follow guidelines, such as anchoring the frame securely, can result in the shelter being unstable or even collapsing. Adhering to the instructions helps avoid common assembly mistakes and ensures the shed remains functional and secure. Proper assembly also protects your stored items and extends the product’s lifespan, making it a worthwhile investment for outdoor storage needs.

Pre-Assembly Checks and Preparation
Ensure the site is level, clear, and firm. Gather tools, verify all parts are included, and read instructions fully before starting assembly for a smooth process.
Tools and Equipment Required
Assembling the ShelterLogic Shed-in-a-Box requires essential tools like a screwdriver, wrench, pliers, and a ladder. Ensure you have a measuring tape, rope, and a second person for assistance. Organize all parts and hardware before starting to avoid delays. Check the inventory list to confirm all components are present. Proper tools and preparation are crucial for a smooth and safe assembly process. Having everything ready ensures you can follow the instructions effectively and complete the setup without complications.
Choosing the Right Location
Selecting the right location for your ShelterLogic Shed-in-a-Box is crucial for stability and functionality. Ensure the site is flat, level, and clear of debris to prevent uneven assembly. Avoid low-lying areas to minimize water pooling and drainage issues. Choose a spot with good access to ensure easy movement of equipment in and out. Consider sunlight exposure to avoid direct UV damage to the cover. Secure the shed in an area with minimal foot traffic to prevent accidental damage. Proper placement ensures the shed remains stable and serves its purpose effectively. Always follow the manufacturer’s recommendations for ideal placement and anchoring.
Unpacking and Inventory of Parts
Begin by carefully unpacking the ShelterLogic Shed-in-a-Box to avoid damaging any components. Lay out all parts on a clean, flat surface for easy access. Use the provided inventory list to verify that all items, such as frame pieces, connectors, anchor kits, and the fabric cover, are included and undamaged. Check for any signs of wear or missing hardware. If any parts are damaged or missing, contact ShelterLogic customer support immediately. Organizing the parts beforehand ensures a smoother assembly process. Proper inventory is essential to avoid delays or complications during construction. Take your time to ensure everything is accounted for before proceeding.
Understanding the Assembly Process
The ShelterLogic Shed-in-a-Box assembly involves attaching the frame, securing the cover, and anchoring the structure. Follow instructions completely for proper installation and weather resistance.
Step-by-Step Guide to Frame Assembly
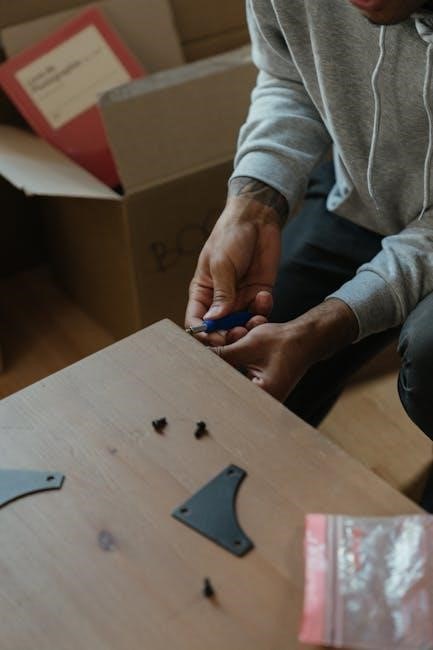
Begin by unpacking and organizing all frame components. Start with the base rails, connecting them to form a rectangular shape. Attach the side and roof poles, ensuring all fittings are secure. Use the provided hardware to tighten connections firmly. Next, assemble the roof frame by connecting the peaks and ribs, making sure they align properly. Finally, attach the door frames and secure the entire structure with anchor kits to prevent shifting. Always follow the manufacturer’s instructions and consider having a second person assist for stability and accuracy. Proper alignment and tightening are crucial for a sturdy frame that withstands weather conditions.
Attaching the Cover and Securing the Structure
Start by attaching the cover to the frame, beginning with the door panel. Ensure the cover is aligned evenly and tight. Use elastic cords to secure the cover to the frame, starting from the bottom and working upward. Tighten all straps and connections to prevent sagging. Once the cover is in place, use the anchor kit to secure the structure firmly to the ground. Double-check all attachments for a snug, even fit. Make sure no loose edges or gaps remain, as this can compromise stability. Properly securing the cover and structure ensures durability and protection against weather conditions.
Final Checks and Adjustments
After completing the assembly, perform a thorough inspection to ensure all parts are securely in place. Check for any loose connections or bolts and tighten them as needed. Verify that the cover is evenly stretched and tightly secured to the frame, with no sagging or wrinkles. Ensure all anchor points are firmly attached to the ground to provide stability. Make any necessary adjustments to the frame or cover for proper alignment. Finally, inspect the entire structure for any damage or wear, addressing issues immediately to prevent further problems. These final checks are crucial for ensuring the shelter’s safety, stability, and long-term durability.

Safety Guidelines and Precautions
Ensure safety by wearing protective gear, securing the area, and anchoring properly. Follow instructions to prevent accidents. Check manufacturer guidelines for secure installation and durability.
Personal Safety Measures During Assembly
Wear protective gear like gloves and safety glasses to prevent injuries. Ensure the area is clear of obstacles and tripping hazards. Always maintain three points of contact when using ladders. Avoid overreaching and never stand on unstable surfaces. Keep loose clothing and long hair tied back to prevent entanglement with tools or moving parts. If using power tools, ensure they are in good working condition. Properly secure the frame before attaching the cover to avoid sudden movements. If unsure about any step, seek assistance or consult the manual. Safety should always be the top priority during assembly to prevent accidents and ensure a successful setup.
Weather Conditions for Safe Installation
Ensure the assembly is conducted in calm weather, avoiding strong winds, heavy rain, or extreme temperatures. Wind can destabilize the frame, while rain may make surfaces slippery. Ideal conditions are clear skies with light or no wind. Avoid assembling during storms or when lightning is present; If temperatures are too low, hardware may become brittle, and cover materials could stiffen. Always secure the shelter immediately after assembly to prevent damage from sudden gusts. Proper anchoring is crucial to withstand weather conditions. Delay installation if unfavorable weather is forecasted to ensure safety and structural integrity.

Troubleshooting Common Issues
Identify and address assembly problems promptly to ensure stability and durability. Check for loose hardware, misaligned frames, or uneven ground. Consult the manual for solutions or contact customer support for assistance.
Resolving Frame Alignment Problems
Frame alignment issues are common during assembly. Ensure the ground is level and all bolts are tightened evenly. If the frame is misaligned, check the anchor points and adjust them as needed. Loose hardware can cause instability, so re-tighten all connections. If the problem persists, refer to the manual for guidance or consult ShelterLogic support. Proper alignment is crucial for structural integrity and weather resistance. Addressing these issues early prevents further damage and ensures the shelter remains stable and secure. Always follow the manufacturer’s recommendations for resolving frame alignment to maintain warranty validity and ensure safe usage.
Dealing with Tight or Loose Cover Fit
A tight or loose cover fit can compromise the structural integrity of your ShelterLogic Shed-in-a-Box. If the cover is too tight, it may stretch or tear, while a loose fit can cause flapping in the wind, leading to damage. To address this, ensure the frame is properly aligned and all edges are evenly secured. Adjust the tension straps or ropes to achieve a snug fit without over-tightening. If the cover remains ill-fitting, inspect for any obstructions or creases and smooth them out. Regularly check and tighten the cover during maintenance to ensure optimal performance and protection against weather conditions. Proper fit ensures durability and functionality.
Addressing Missing or Damaged Parts
Before assembly, thoroughly inspect all parts for completeness and damage. Missing components can delay assembly, while damaged parts may compromise the structure’s integrity. If any items are missing or damaged, contact ShelterLogic customer support for replacements. Do not proceed with assembly using damaged parts, as this could lead to safety hazards or poor performance. Regularly inspect the shelter after assembly for signs of wear or tear, especially after severe weather. Addressing these issues promptly ensures the shelter remains safe and functional. Proper maintenance and timely repairs are essential for extending the lifespan of your ShelterLogic Shed-in-a-Box and ensuring its reliability in various conditions.
Maintenance and Repair Tips
Regularly clean and inspect the shelter for debris and damage. Repair tears promptly and re-tighten loose hardware to ensure stability. Check anchors for secure placement to withstand harsh weather conditions effectively.
Cleaning and Inspecting the Shelter
Regular cleaning and inspection are crucial for maintaining the ShelterLogic Shed-in-a-Box. Start by removing dirt and debris with a soft brush or cloth. Use mild detergent and water for tougher stains, avoiding harsh chemicals that may damage the fabric. Inspect the roof and walls for tears or wear, addressing any issues promptly to prevent further damage. Check hardware for looseness and tighten as needed. Ensure the shelter is securely anchored to withstand wind and weather conditions. Perform these tasks seasonally to prolong the shelter’s lifespan and ensure optimal performance. Neglecting maintenance can lead to structural weaknesses and reduced durability over time.

Repairing Tears or Damage to the Cover
For minor tears or damage to the ShelterLogic Shed-in-a-Box cover, begin by assessing the extent of the damage. Use a fabric repair kit or durable patches specifically designed for outdoor fabrics. Apply a thin layer of fabric adhesive to the patch and press firmly over the tear, ensuring a secure seal. For larger damages, consider using a heavy-duty fabric repair tape. Allow the adhesive to dry completely before exposing the shelter to weather. Regularly inspect the cover for signs of wear and address issues promptly to prevent further deterioration. Avoid using harsh chemicals, as they may weaken the fabric. Proper repairs will extend the cover’s lifespan and maintain its protective qualities. Inspect repairs regularly to ensure durability.
Re-tightening Loose Hardware
Regularly inspect and re-tighten all bolts, screws, and fasteners to ensure the stability of your ShelterLogic Shed-in-a-Box. Over time, hardware may loosen due to weather conditions or natural settling. Start by checking all connections, paying attention to the frame and roof joints. Use a wrench or screwdriver to tighten any loose parts firmly. For moving parts, apply a small amount of silicone-based lubricant to prevent rust and ensure smooth operation. If hardware is damaged or corroded, replace it immediately to maintain structural integrity. Re-tightening hardware is a simple yet crucial step to prevent damage and extend the lifespan of your shelter.
Proper assembly and maintenance are crucial for the longevity and functionality of your ShelterLogic Shed-in-a-Box. Follow instructions carefully to ensure durability and protection for your stored items.
Importance of Proper Assembly and Maintenance
Proper assembly and maintenance are essential for ensuring the durability and functionality of your ShelterLogic Shed-in-a-Box. Correctly following the instructions prevents structural issues and ensures safety. Regular cleaning, inspections, and hardware checks maintain the integrity of the shelter. Neglecting maintenance can lead to damage from weather or wear and tear. Manufacturer guidelines are designed to maximize the product’s lifespan and protect your stored items. By adhering to these practices, you ensure your shed remains stable, secure, and functional for years. Proper care also prevents potential hazards, making it a reliable storage solution for seasonal needs.